
Introduction
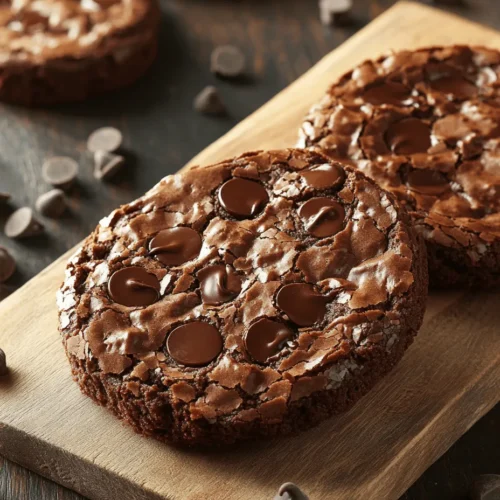
In the realm of desserts, few treats can rival the indulgent combination of brownies and cookies. Enter the browkie—a delightful hybrid dessert that has captured the hearts and taste buds of dessert lovers everywhere. Browkies are the perfect marriage of a rich, fudgy brownie base and a soft, chewy cookie layer on top, creating an irresistible dessert experience that appeals to both brownie enthusiasts and cookie aficionados alike. Their rising popularity can be attributed to their unique texture and flavor profile, which offers the best of both worlds in a single bite.
Imagine breaking into a warm, gooey brownie only to discover a chewy cookie layer that complements its richness. This article invites you to explore the deliciousness of the best fudgy chewy browkies, a recipe that promises to satisfy your sweet cravings and impress your friends and family. Whether you’re hosting a gathering or simply indulging in a personal treat, these browkies are sure to become a staple in your dessert repertoire.
The Inspiration Behind Browkies
To truly appreciate the browkie, it helps to understand the history of the two beloved desserts that inspired it. Brownies originated in the United States in the late 19th century, with various tales attributing their creation to different bakers. One popular story suggests that a chef at the Palmer House Hotel in Chicago crafted the first brownie as a dessert for a World’s Fair event. These early brownies were dense, chocolatey, and often included nuts, setting the stage for countless variations to come.
Cookies, on the other hand, have an even longer history, dating back to 7th century Persia and evolving through various cultures and ingredients over the centuries. The chocolate chip cookie—arguably one of the most famous cookie varieties—was invented in the 1930s by Ruth Wakefield when she added chunks of chocolate to her butter cookie dough. The result was a warm, melty treat that has since become a household favorite.
The evolution of combining brownies and cookies into what we now call browkies can be traced back to the rising trend of dessert mashups. As bakers and home cooks began experimenting with flavors and textures, the idea of merging these two classics became a deliciously appealing option. My own journey into the world of browkies began when I stumbled upon a recipe at a local bakery. The moment I took my first bite, I was hooked. The gooey brownie layer combined with the chewy cookie top was a revelation, and I knew I had to recreate this masterpiece in my own kitchen.
Key Ingredients for the Fudgy Chewy Browkies
Creating the best fudgy chewy browkies starts with selecting quality ingredients. Each component plays a critical role in achieving the perfect balance of flavor and texture. Below is an overview of the essential ingredients needed for both the brownie and cookie layers.
For the Brownie Layer:
– High-Quality Chocolate: Choose semi-sweet or dark chocolate with a cacao content of at least 60%. This will ensure a rich, deep chocolate flavor that elevates the brownie layer.
– Unsalted Butter: The butter not only adds richness but also aids in achieving that fudgy texture. Make sure to use unsalted butter so you can control the saltiness of your browkies.
– Granulated and Brown Sugar: A combination of both sugars provides sweetness while the brown sugar contributes to the moisture and chewiness of the brownies.
– Eggs: Essential for binding the ingredients together, eggs also add richness and contribute to the overall texture.
– All-Purpose Flour: This is the base of the brownie layer. Too much flour can result in a dry texture, so be sure to measure carefully.
– Baking Powder and Salt: These ingredients help with the leavening process and enhance the overall flavor of the brownies.
For the Cookie Layer:
– All-Purpose Flour: Like the brownie layer, flour is crucial for structure. Use the same type for consistency.
– Brown Sugar: Using more brown sugar than granulated sugar helps create that chewy cookie texture. The molasses in brown sugar retains moisture, making the cookies soft.
– Granulated Sugar: This adds sweetness and helps create a slightly crispy exterior.
– Unsalted Butter: Similar to the brownie layer, butter is key for flavor and texture.
– Eggs: Eggs bind the cookie dough together, ensuring a cohesive texture.
– Baking Soda: This ingredient helps the cookies rise and spread, contributing to their chewy consistency.
– Chocolate Chips: Semi-sweet or dark chocolate chips are essential for that chocolatey goodness in every bite.
Nutritional Highlights of the Key Ingredients
While browkies are undoubtedly a treat, understanding the nutritional aspects of the key ingredients can help you appreciate them even more. High-quality chocolate is rich in antioxidants and can elevate your mood, while eggs offer protein and essential nutrients. Brown sugar, with its trace minerals, adds a touch of healthiness to the delectable dessert. Though indulgent, when made with care, browkies can be enjoyed as an occasional treat that satisfies your sweet tooth without compromising on quality.
Preparation Steps for the Brownie Layer
Now that we have our ingredients ready, let’s dive into the preparation of the brownie layer. Follow these detailed steps to ensure you achieve the perfect fudgy brownie base for your browkies.
1. Melt the Chocolate and Butter: Begin by preheating your oven to 350°F (175°C). In a medium saucepan over low heat, combine the chopped chocolate and unsalted butter. Stir gently until both are completely melted and smooth. This step is crucial as it ensures that the chocolate is evenly incorporated, contributing to a fudgy texture.
2. Combine Sugars: Once melted, remove the saucepan from heat and let it cool for a few minutes. In a large mixing bowl, combine the granulated sugar and brown sugar. Pour the melted chocolate mixture into the bowl, stirring well to combine. The sugars will dissolve, creating a rich, glossy mixture.
3. Add Eggs: Beat the eggs separately and then add them to the chocolate mixture. Stir vigorously until the mixture is thick and shiny. This is an important step—fully incorporating the eggs will help create that fudgy texture we’re aiming for.
4. Incorporate Dry Ingredients: In another bowl, whisk together the all-purpose flour, baking powder, and salt. Gradually add this dry mixture to the wet ingredients, folding gently until just combined. Be careful not to overmix, as this can lead to a cakey texture rather than the desired fudginess.
5. Prepare the Baking Pan: Line an 8×8 inch baking pan with parchment paper, leaving some overhang for easy removal later. Pour the brownie batter into the prepared pan, spreading it evenly with a spatula.
Tips on Achieving the Perfect Fudgy Texture
– Use Quality Chocolate: Opt for chocolate with a high cocoa content for a deeper flavor and richer texture.
– Don’t Overbake: Keep an eye on the brownies while baking. They are done when a toothpick inserted comes out with a few moist crumbs, indicating a fudgy center.
– Chill Before Layering: Allow the brownie layer to cool completely before adding the cookie layer. This helps to maintain the distinct layers in the browkies.
Crafting the Cookie Layer
With the brownie base prepared, it’s time to turn our attention to the cookie layer. Follow these step-by-step instructions to create a deliciously chewy cookie layer that will sit atop your fudgy brownie base.
1. Cream the Butter and Sugars: In a large mixing bowl, cream together the unsalted butter, brown sugar, and granulated sugar until the mixture is light and fluffy. This process incorporates air, which will help create a tender cookie texture.
2. Add the Eggs and Vanilla: Beat in the eggs one at a time, followed by the vanilla extract. Ensure that each egg is fully incorporated before adding the next. The vanilla extract adds depth of flavor to the cookies.
3. Combine Dry Ingredients: In another bowl, whisk together the all-purpose flour, baking soda, and salt. Gradually add this dry mixture to the wet ingredients, stirring until just combined. Avoid overmixing to maintain the chewy texture.
4. Fold in Chocolate Chips: Finally, gently fold in the chocolate chips, ensuring they are evenly distributed throughout the cookie dough.
Tips for Achieving the Ideal Chewy Consistency
– Use Brown Sugar: The higher proportion of brown sugar in the cookie layer is essential for that chewy texture. The moisture-retaining properties of brown sugar help create a soft cookie.
– Chill the Dough: For even better texture, consider chilling the cookie dough for at least 30 minutes before layering. This helps the cookies maintain their shape while baking.
– Don’t Overbake: Similar to the brownies, keep an eye on the cookies. They should be just set around the edges but still slightly soft in the center.
Layering the Browkies
Now that both layers are prepared, it’s time to bring them together to create the ultimate dessert experience.
1. Spread the Cookie Layer: Once the brownie layer has cooled completely, take spoonfuls of the cookie dough and dollop it over the brownie layer. Use a spatula or your hands to spread the cookie dough evenly over the top, ensuring that it covers the brownie layer as uniformly as possible.
2. Bake: Place the assembled browkies in the preheated oven and bake for approximately 25-30 minutes, or until the cookie layer is golden brown and a toothpick inserted into the center comes out with a few moist crumbs.
3. Cool and Serve: Allow the browkies to cool in the pan for at least 15 minutes before lifting them out using the parchment overhang. Transfer them to a wire rack to cool completely before cutting into squares.
This recipe for fudgy chewy browkies is sure to become a favorite among family and friends. The combination of rich brownie and chewy cookie creates a delightful treat that is perfect for any occasion.

Techniques for Layering Brownie and Cookie Batters
Creating the perfect browkies requires a careful layering technique to ensure that both the brownie and cookie batters work together harmoniously. Start by preparing both batters separately, ensuring they are of similar thickness for a seamless blend. When layering, begin with the brownie batter first. Use a spatula to spread it evenly across the bottom of your prepared baking dish, ensuring you reach the corners for consistent baking.
Next, gently spoon the cookie batter on top of the brownie layer. To avoid mixing the two batters, consider dolloping the cookie batter in several places instead of pouring it all in one go. This method allows for better control over the distribution. Use a spatula to lightly spread the cookie batter without mixing it into the brownie layer. The goal is to create distinct layers while still allowing them to meld slightly during baking.
Even distribution is crucial for achieving the ideal texture and flavor. Uneven layers can lead to parts of the browkies being overcooked while others remain undercooked. Pay attention to visual cues: the brownie layer should be visibly darker and shinier, while the cookie layer should appear lighter and more matte. This contrast not only enhances the aesthetic appeal but also indicates the appropriate thickness of each layer.
Baking the Browkies
With the layers carefully constructed, it’s time to bake your browkies to perfection. Preheat your oven to 350°F (175°C), ensuring it reaches the optimal temperature for even baking. Once the oven is hot, place the baking dish in the center rack. The baking time for browkies can vary depending on your oven and the thickness of the layers, but generally, it will take about 25 to 30 minutes.
Determining doneness is an essential step in baking. Use the toothpick method: insert a toothpick into the center of the browkies. If it comes out with a few moist crumbs clinging to it, the browkies are done. If it comes out with wet batter, give them a few more minutes in the oven. Remember, the browkies will continue to cook slightly as they cool, so it’s better to err on the side of slightly underbaking for that fudgy texture.
Cooling time is vital for the final texture. Allow the browkies to cool in the baking dish for about 15 minutes before transferring them to a wire rack. This cooling period allows the layers to set properly, making them easier to cut and enhancing their overall texture. Patience is key; while it may be tempting to dive in right away, letting them cool will yield a more satisfying chew.
Serving Suggestions for Browkies
Browkies are incredibly versatile when it comes to serving. One popular option is to serve them warm with a scoop of vanilla ice cream on top. The warm, fudgy texture of the browkies pairs beautifully with the creaminess of the ice cream, creating a delightful contrast. Drizzling them with chocolate sauce or caramel adds an extra layer of indulgence that chocolate lovers will adore.
For a more sophisticated presentation, consider serving your browkies with fresh berries or a dusting of powdered sugar. The tartness of the berries complements the rich chocolate flavor beautifully. Pairing browkies with a glass of cold milk or a rich coffee beverage can enhance the experience, making it a perfect dessert for any gathering.
When hosting an event, think creatively about how to showcase your browkies. Cut them into bite-sized squares and arrange them on a decorative platter. You can even create a dessert bar where guests can customize their browkies with toppings such as whipped cream, nuts, or fruit compote. This interactive approach not only engages your guests but also allows everyone to enjoy the browkies in their own unique way.
Storing and Reheating Browkies
To maintain the freshness and deliciousness of your browkies, proper storage is essential. If you have leftovers, allow the browkies to cool completely before storing them. Place them in an airtight container at room temperature for up to three days. If you plan to keep them longer, refrigeration is an option, although it may change the texture slightly.
For reheating, preheat your oven to 350°F (175°C) and place the browkies on a baking sheet. Heat them for about 5-10 minutes until they are warm throughout. This method helps to restore their fudgy texture, making them taste freshly baked again. Alternatively, you can microwave individual squares for about 15-20 seconds for a quick treat, but be cautious not to overheat, as this can lead to a rubbery texture.
If you want to store browkies for a longer duration, freezing is an excellent option. Wrap each square tightly in plastic wrap or aluminum foil, then place them in a freezer-safe bag or container. Browkies can be frozen for up to three months. When you’re ready to enjoy them, simply thaw them in the refrigerator overnight and reheat as desired.
Variations and Customizations
One of the best aspects of browkies is their adaptability. If you or someone you’re serving has nut allergies, you can easily substitute nut-based ingredients with seeds or simply omit them. For those looking to add a bit of crunch, consider mixing in chopped nuts, such as walnuts or pecans, into the brownie layer. For a fruity twist, incorporate dried fruits like cranberries or cherries for a delightful burst of flavor.
Exploring flavor variations can elevate your browkies further. Experiment with different extracts like almond or coconut for a unique taste. Adding a pinch of cinnamon or espresso powder to the brownie batter can deepen the chocolate flavor, making them even more decadent. You can also consider using flavored chocolate chips, such as mint or butterscotch, to personalize your browkies.
For a fun twist, try making a layered browkie cake by baking the batter in a round cake pan. Once cooled, cut it into layers and spread frosting between the layers, creating a stunning dessert that’s perfect for celebrations. The possibilities are endless, and these variations allow you to tailor the recipe to suit your taste preferences and occasions.
Conclusion
Making fudgy, chewy browkies brings unparalleled joy and satisfaction. The process of creating this delightful dessert combines the best of both worlds—rich brownies and chewy cookies—into one irresistible treat. Whether you enjoy them warm with ice cream or feature them at a gathering, browkies are sure to impress.
We encourage you to try this recipe and share your experiences with family and friends. The timeless appeal of combining brownies and cookies lies in their ultimate comfort and indulgence, making them a cherished addition to any dessert repertoire. Embrace the creativity that comes with browkies, and let your baking adventures begin!