
Introduction
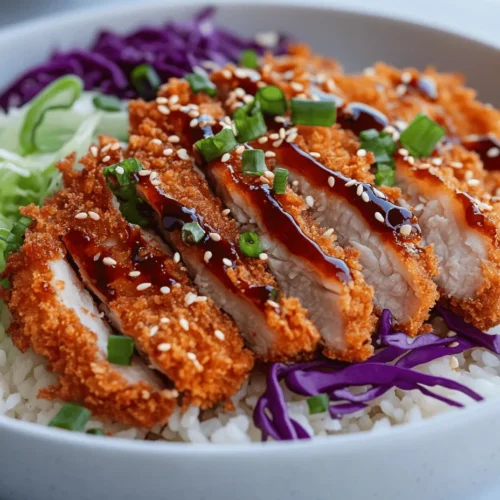
Katsu cuisine has carved out a prominent place in Japanese cooking, becoming a beloved dish that resonates with food lovers around the world. Known for its satisfying crunch and flavorful profile, Katsu has transformed from a simple meal into a culinary staple that can be found in restaurants and homes alike. At its core, Katsu features a breaded and deep-fried cutlet, typically made from pork or chicken, served alongside a bed of rice and crisp vegetables. Today, we will delve into the world of Crispy Katsu Bowls with Homemade Tonkatsu Sauce, a dish that perfectly encapsulates the essence of Katsu while offering a delightful balance of flavors and textures.
This recipe highlights the star of the show—the crispy pork Katsu—paired with a zesty homemade Tonkatsu sauce that elevates the dish to new heights. The beauty of creating these Katsu bowls at home lies in their simplicity and the satisfaction derived from crafting each component from scratch. Whether you’re preparing a cozy weeknight dinner or impressing guests at a special gathering, this dish is versatile enough to suit any occasion. With just a few ingredients and straightforward techniques, you can experience the rich flavors of Japanese cuisine right from your kitchen.
Understanding Katsu and its Cultural Significance
To truly appreciate Katsu, we must explore its origins and cultural relevance within Japanese culinary traditions. The term “Katsu” is derived from the Japanese word “katsuretsu,” which means “cutlet.” This dish has roots in the 19th century when it was influenced by Western cooking techniques and flavors, particularly the introduction of breaded meat dishes from Europe. Over time, Katsu evolved into various forms, with pork and chicken becoming the most popular choices.
Katsu holds a special place in the hearts of many Japanese people as a quintessential comfort food. It is often associated with home-cooked meals and family gatherings, where the crispy cutlet is enjoyed alongside steaming bowls of rice and fresh vegetables. The dish embodies the principles of balance and harmony in Japanese cuisine, where each element complements the others to create a satisfying culinary experience.
In modern times, Katsu has seen an explosion of variations, from the classic Tonkatsu (pork cutlet) to Chicken Katsu and even vegetarian options using eggplant or tofu. This adaptability has allowed Katsu to transcend cultural boundaries, making it a favorite dish among food enthusiasts worldwide.
Ingredients Breakdown for Crispy Katsu Bowls
Creating the perfect Crispy Katsu Bowls requires a thoughtful selection of ingredients that work harmoniously to achieve the desired flavor and texture. Let’s break down the essential components of this recipe, starting with the Katsu itself.
Main Ingredients for the Katsu
1. Boneless Pork Chops: The choice of meat is crucial for a successful Katsu. Boneless pork chops are ideal due to their tenderness and flavor. When selecting your cut, look for chops that are slightly marbled with fat, as this will enhance the taste and juiciness of the finished product.
2. Flour: All-purpose flour is used to create the first layer of the breading. It acts as a binding agent, allowing the egg to adhere to the meat and ensuring the panko breadcrumbs stick effectively.
3. Eggs: Beaten eggs contribute moisture and richness to the breading process. They help the panko adhere to the pork and create that coveted golden crust during frying.
4. Panko Breadcrumbs: Panko, a type of Japanese breadcrumb, is essential for achieving a light, crispy texture. Unlike traditional breadcrumbs, panko is coarser and airier, resulting in a crunchier coating. Ensure you choose authentic panko for the best results.
Homemade Tonkatsu Sauce Ingredients
The sauce is what truly elevates your Katsu bowls, providing a rich, tangy flavor that complements the crispy cutlet beautifully. Here are the key ingredients for the homemade Tonkatsu sauce:
1. Ketchup: This sweet and tangy base adds depth and a familiar flavor profile to the sauce.
2. Worcestershire Sauce: This ingredient contributes a complex umami flavor, balancing the sweetness of the ketchup with savory notes.
3. Soy Sauce: Providing a salty depth, soy sauce enhances the overall flavor of the sauce, adding a quintessentially Japanese touch.
4. Mirin: A sweet rice wine, mirin adds a hint of sweetness and complexity, rounding out the sauce’s flavor.
5. Sugar: A small amount of sugar can be added to adjust the sweetness to your preference, providing a well-rounded taste.
6. Mustard: For a bit of tang and heat, a dash of mustard can be incorporated, adding an extra layer of flavor.
Bowl Components
While the Katsu and Tonkatsu sauce take center stage, the bowl’s other components also play a vital role in creating a balanced meal. Here’s what you’ll need:
1. Steamed Rice: A fluffy bed of steamed white rice is the perfect foundation for your Katsu bowl, absorbing the sauce and providing a neutral base that complements the flavors.
2. Cabbage: Finely shredded cabbage adds a refreshing crunch and a hint of bitterness that balances the rich flavors of the Katsu and sauce.
3. Garnishes: Fresh garnishes, such as chopped scallions or sesame seeds, provide visual appeal and an extra burst of flavor. Consider adding pickled vegetables for an additional tangy note.
Step-by-Step Guide to Making Crispy Katsu
Now that you understand the components of your Crispy Katsu Bowls, let’s dive into the step-by-step process of making this delectable dish, starting with the preparation of the Tonkatsu sauce.
Preparing the Tonkatsu Sauce
1. Mix Ingredients: In a small bowl, combine 1/2 cup of ketchup, 2 tablespoons of Worcestershire sauce, 1 tablespoon of soy sauce, 1 tablespoon of mirin, and 1 teaspoon of sugar. If you enjoy a bit of heat, add a teaspoon of mustard as well.
2. Whisk Together: Using a whisk or fork, mix the ingredients thoroughly until well combined. Taste the sauce and adjust the seasoning as needed, adding more sugar for sweetness or soy sauce for saltiness.
3. Let It Sit: Allow the sauce to sit at room temperature for at least 15 minutes to let the flavors meld together. This resting time is crucial for achieving a well-balanced sauce.
Preparing the Pork Katsu
1. Pound the Pork: Start by placing your boneless pork chops between two sheets of plastic wrap or parchment paper. Using a meat mallet or rolling pin, gently pound the pork to an even thickness of about 1/2 inch. This process tenderizes the meat and ensures it cooks evenly.
2. Season the Meat: Once the pork is pounded, season it generously on both sides with salt and pepper. This step enhances the flavor of the meat, ensuring a delicious bite with every piece.
3. Set Up a Breading Station: Prepare three shallow dishes for the breading process. In the first dish, place about 1/2 cup of all-purpose flour. In the second dish, crack and beat 2 large eggs. In the third dish, spread out 1 cup of panko breadcrumbs.
4. Bread the Pork: Dredge each seasoned pork chop in the flour, shaking off any excess. Next, dip it into the beaten eggs, allowing any excess to drip off. Finally, coat the pork chop in the panko breadcrumbs, pressing down gently to ensure an even coating.
5. Chill Before Frying: For the best results, place the breaded pork chops on a plate and refrigerate for about 15 minutes. Chilling allows the breading to set, resulting in a crispier texture when fried.
Frying the Katsu
1. Heat the Oil: In a large skillet, pour in enough vegetable oil to submerge the bottom of the pan by about 1/4 inch. Heat the oil over medium-high heat until it shimmers, indicating it’s ready for frying.
2. Fry the Pork: Carefully add the breaded pork chops to the hot oil, making sure not to overcrowd the pan. Fry each side for approximately 3-4 minutes, or until golden brown and crispy. Use tongs to flip the cutlets gently.
3. Drain Excess Oil: Once cooked, transfer the Katsu to a plate lined with paper towels to drain any excess oil. This step ensures your Katsu remains crispy without being greasy.
4. Slice and Serve: Allow the Katsu to rest for a minute before slicing it into strips. This resting period helps retain the juices and keeps the meat tender.
With the Katsu prepared and the Tonkatsu sauce ready to go, you are well on your way to assembling your Crispy Katsu Bowls. Next, all that remains is to add the finishing touches and enjoy this delightful dish that captures the essence of Japanese comfort food. Stay tuned for the final steps and tips to make your Katsu bowls truly shine!
The Breading Process Explained in Detail
Creating the ultimate crispy katsu is all about the breading process, which involves three essential components: flour, egg, and panko breadcrumbs. Each step plays a crucial role in achieving that golden, crunchy exterior that makes katsu so irresistible.
1. Flour: Start by lightly coating the protein in all-purpose flour. This step serves two primary purposes: it helps to absorb any excess moisture from the meat, creating a better surface for the egg to adhere to, and it acts as a barrier to prevent the meat from becoming greasy during frying. Use a shallow dish to make it easy to dredge the katsu evenly.
2. Egg: The next step is to dip the floured protein into beaten egg. The egg acts as a glue, binding the panko to the meat. Ensure that the entire surface is coated by allowing any excess egg to drip off before moving on to the panko stage. This will help create a more even layer of breadcrumbs, leading to a consistent crunch.
3. Panko Breadcrumbs: Finally, coat the egg-covered protein with panko breadcrumbs. Panko, which are Japanese-style breadcrumbs, are coarser and lighter than traditional breadcrumbs, providing that distinctive airy crunch. Press the panko onto the meat to ensure it sticks well and forms a solid crust during frying. This step is critical; without a proper panko coating, the katsu may not achieve its desired texture.
Frying Tips for Optimal Results
Frying is where the magic happens, and there are several tips to ensure your katsu turns out perfectly crispy without being greasy.
1. Oil Temperature: The ideal oil temperature for frying katsu is between 350°F to 375°F (175°C to 190°C). To check if your oil is hot enough, drop a small piece of bread into the oil; if it bubbles and turns golden brown after a few seconds, the oil is ready. Frying in oil that is too cold will result in soggy katsu, while overly hot oil can burn the coating before the meat is cooked through.
2. Frying Techniques: Fry your katsu in small batches to avoid overcrowding the pan, which can lower the oil temperature and lead to uneven cooking. Use enough oil to submerge the katsu halfway, allowing it to fry evenly. Flip the katsu halfway through cooking to ensure both sides achieve that perfect golden brown color. Aim for about 3 to 4 minutes on each side, depending on the thickness of the meat.
3. Draining Excess Oil: Once cooked, transfer the katsu to a wire rack or paper towel-lined plate to drain any excess oil. This will help maintain the crispiness of the breading. Avoid placing the katsu directly on a flat surface, as it can trap steam and lead to sogginess.
Constructing the Perfect Katsu Bowl
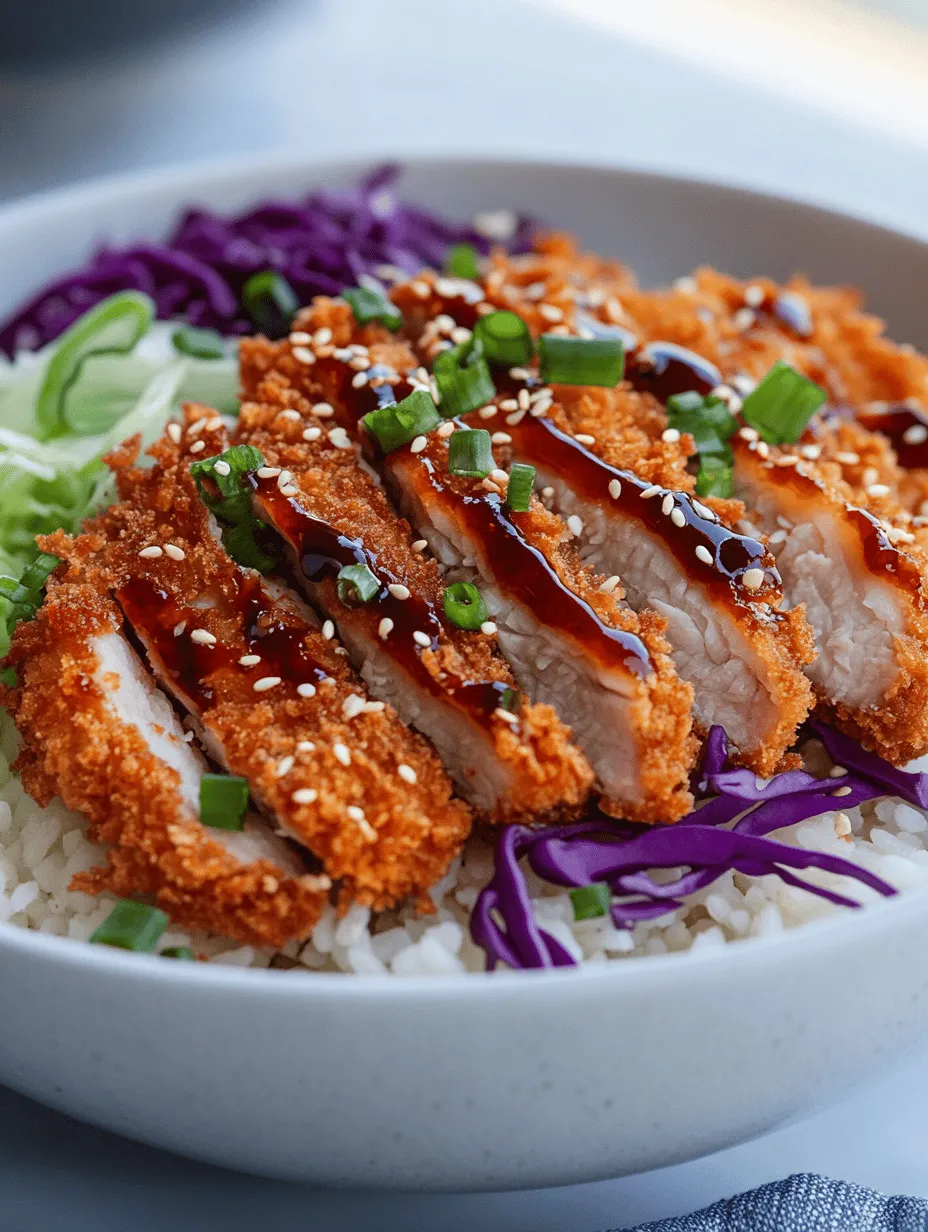
Now that you have the perfectly fried katsu, it’s time to assemble your katsu bowl. Presentation is key, not only for aesthetics but also for enhancing the overall dining experience.
1. Layering the Bowl: Start with a base of fluffy white rice. The rice provides a neutral backdrop that balances the rich flavors of the katsu and sauce. A typical ratio is about 3 parts rice to 1 part katsu. This ensures that the katsu remains the star of the dish while still being complemented by the rice.
2. Cabbage: Next, add a generous portion of finely shredded cabbage. The crunch of the cabbage adds a refreshing contrast to the tender katsu, while its slight bitterness helps cut through the richness of the dish. Aim for equal parts cabbage to katsu for a well-rounded bowl.
3. Slicing and Arranging the Katsu: Properly slice the katsu before serving. Use a sharp knife and cut against the grain into thin strips, about half an inch thick. This not only makes it easier to eat but also allows for better sauce absorption. Arrange the sliced katsu artfully over the rice and cabbage for an appealing presentation.
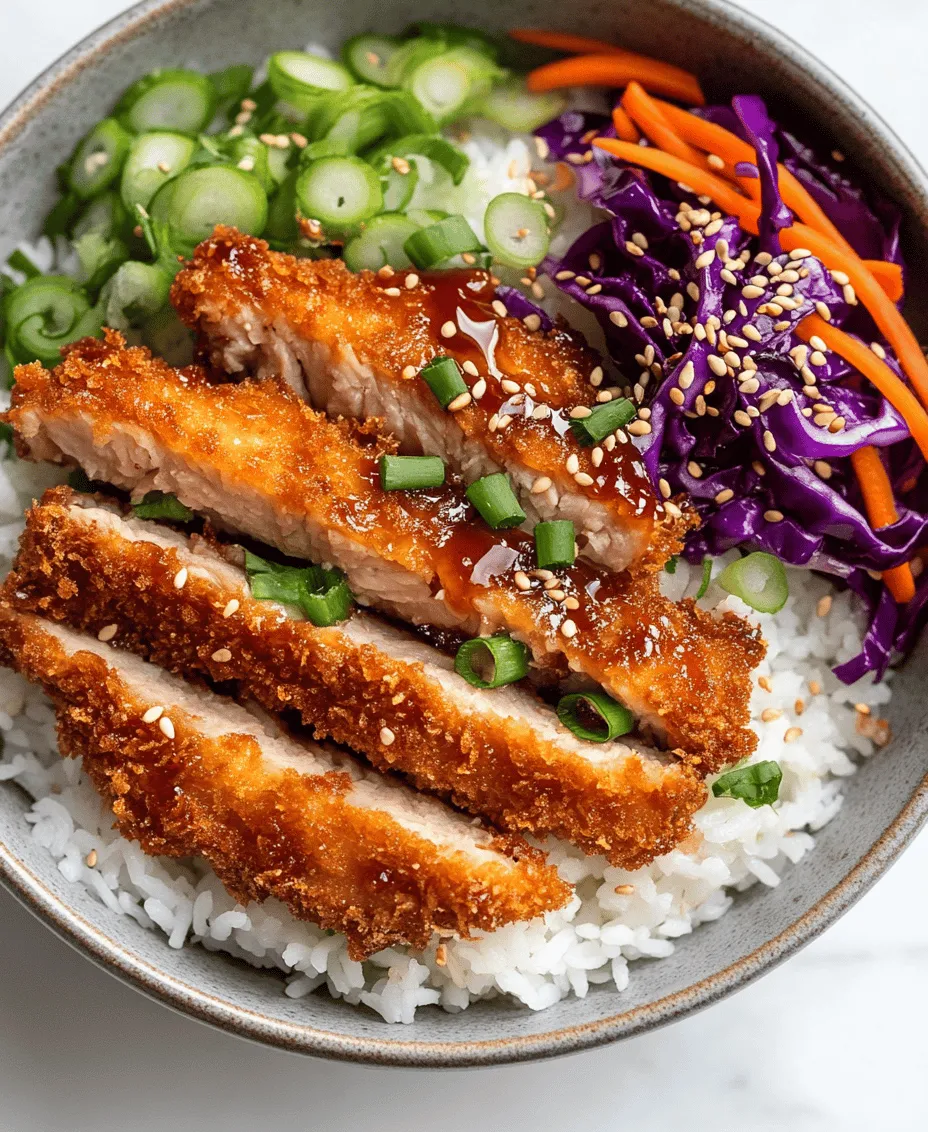
4. Garnishes: Don’t forget the finishing touches! Sprinkle sliced scallions and sesame seeds over the top to enhance both flavor and presentation. These garnishes add a pop of color and texture, elevating your katsu bowl to restaurant-quality status.
Serving and Enjoying Your Katsu Bowls
Katsu bowls are not just a meal; they’re an experience steeped in cultural significance. Here are some serving suggestions and pairing options to enhance your katsu enjoyment.
1. Paired with Tonkatsu Sauce: Serve your katsu bowl drizzled generously with homemade tonkatsu sauce. The sweet and tangy flavors of the sauce complement the savory katsu beautifully. For an extra kick, consider offering a side of spicy mustard or pickled ginger to cleanse the palate.
2. Cultural Context: In Japan, katsu bowls are often enjoyed as a hearty meal, sometimes accompanied by miso soup or a small salad. This balanced approach emphasizes the importance of flavor and nutrition, making katsu a favorite among families.
3. Variations and Twists: While the classic katsu is made with pork or chicken, feel free to experiment with different proteins. You can use tofu for a vegetarian option or even fish for a lighter twist. Additionally, consider trying variations of the tonkatsu sauce by adding different spices or flavorings, such as garlic or chili paste, to tailor it to your taste.
Nutritional Information and Health Considerations
When preparing katsu bowls, it’s essential to be mindful of nutritional content and health considerations.
1. Nutritional Breakdown: A typical serving of a katsu bowl may contain approximately 600-800 calories, depending on the serving size and ingredients used. Here’s a rough breakdown per serving:
– Calories: 700
– Protein: 30g
– Fats: 25g
– Carbohydrates: 90g
This balance of macronutrients makes katsu bowls a satisfying meal, providing ample protein and carbs for energy.
2. Balance of Flavors and Nutrients: The combination of crispy katsu, fresh cabbage, and rice offers a delightful fusion of flavors and textures while providing essential nutrients. Cabbage adds fiber, while the meat offers protein, making this a well-rounded dish.
3. Dietary Modifications: If you’re looking for gluten-free options, substitute regular flour with rice flour and use gluten-free panko. For a vegetarian alternative, consider using eggplant or portobello mushrooms as the protein base, ensuring the breading process remains consistent.
Conclusion
Creating and enjoying Crispy Katsu Bowls with Homemade Tonkatsu Sauce is a rewarding culinary experience that encapsulates the essence of Japanese cuisine. The joy of mastering the breading and frying techniques, combined with the satisfaction of layering a beautifully presented bowl, makes this dish a favorite for both novice and experienced cooks alike.
We encourage you to try this recipe at home and impress your family and friends with your culinary skills. The delightful crunch of the katsu, paired with the rich flavors of the sauce and fresh vegetables, promises to bring everyone to the table for a memorable meal. Embrace the journey of cooking and the joy of sharing delicious food, and you’ll find that crafting a homemade katsu bowl is not just a meal—it’s a celebration of flavor and culture.